

Moderator's Added Note:
---begin added note---
Great info! Just want to inform for novice users: This advanced section is optional to PureXP. It's a great hardcore tweak though -- though might void the GPU warranty depending on what your GPU/board vendor rules on this are (I have to add this disclaimer, as NVIDIA collaborates with Blur Busters from time-to-time) -- Before doing this, make sure you understand UEFI GOP and the advantages; including Fast Boot, higher refresh rates, etc. If the advantages of this tweak isn't important to you (or don't know what a UEFI GOP is) and/or you only plan to use 100Hz-120Hz PureXP without other GPU tweaks -- then you can simply skip to Section #2.
Remember PureXP™ is easy by default, all other advanced tweaks are optional.
---end added note---
So, let's see cleary our friendly UFO!

1. Check your GPU compatibility
My system have two GTX 980 Ti in SLI connected through a DisplayPort
and unfortunately doesn't work with "Compatible G-Sync"
(your computer must be equipped with a GeForce GTX 10-Series or GeForce RTX 20-Series graphics card),
but I can use and see more than 240Hz.
How is it possible? It's all about the firmware inside your video card.
You can easily upgrate this module with an official tool made by NVIDIA: NVIDIA Graphics Firmware Update Tool for DisplayPort 1.3 and 1.4 Displays
The products supported by the tool are:
- NVIDIA TITAN Series
TITAN X (Maxwell), TITAN X (Pascal), TITAN XP - GeForce 10 Series
GeForce GT 1030, GeForce GTX 1050, GTX 1050Ti, GTX 1060, GTX 1070, GTX 1070Ti, GTX 1080, GTX 1080Ti - GeForce 900 Series
GeForce GTX 950, GTX 950Ti, GTX 960, GTX 970, GTX 980, GTX 980Ti - GeForce 700 Series
GeForce GTX 745, GTX 750, GTX 750Ti
Just launch the software and follow all the guided steps, but basically is all automatic.
Hovewer what we have to do if our GPUs have a custom/modded BIOS like mine or you have AMD GPU?
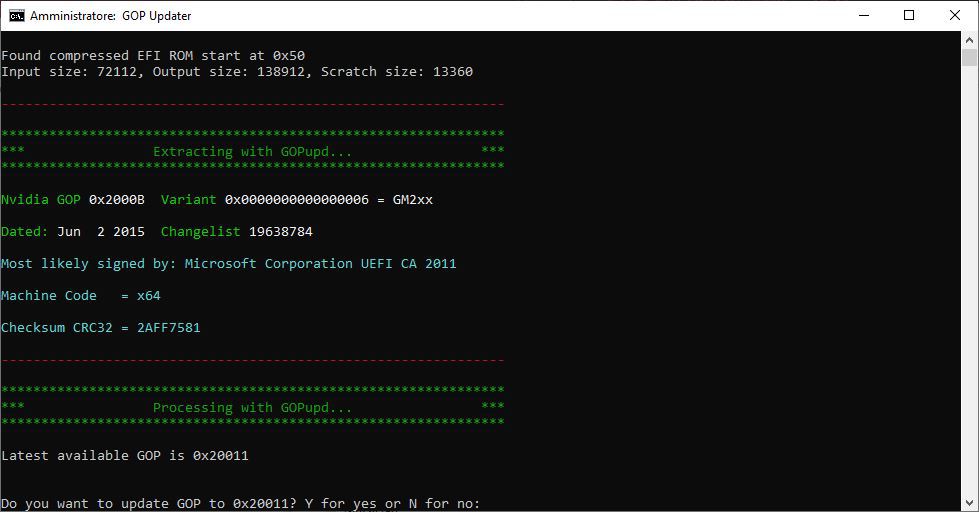
We can use a tool called GOPupd made by lordkag: AMD and Nvidia GOP update
This is suggested only for advanced users and I'm not responsible for any damage. DO AT YOUR OWN RISK!
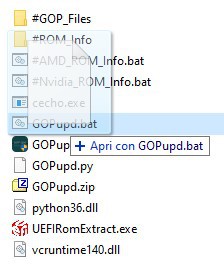
Extract the compressed file in a folder, move and drop your custom BIOS file into GOPupd.bat
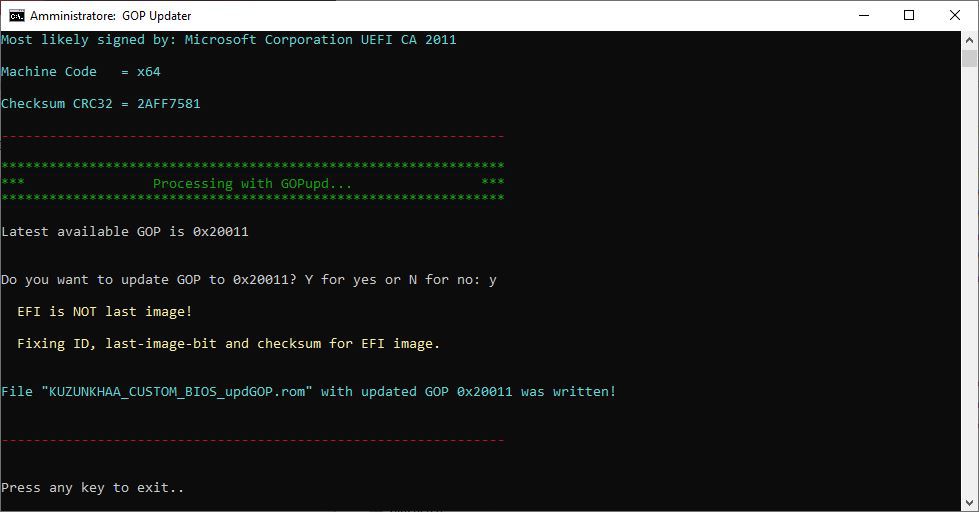
Press Y and Enter key when requested to confirm the update
Now your rom is patched and the new file is inside the GOPupd folder, renamed with "_updGOP" at the end
Now remains only to flash the patched rom inside your GPU.
Remember to use the proper flash tool for your video card!
As an example my GTX 980 Ti is a MAXWELL microarchitecture, so the best NVFlash version to use is the 5.218
(suggested NVFlash downloads and info)
The next tiny tutorial is how I used NVFlash to flash my custom BIOS:
(mythbuster: is not necessary to run the tool with Windows in Safe Mode or to uninstall the GPU driver)
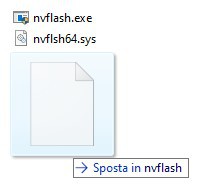
Extract the NVFlash tool in a folder on the root of your disk (usually C:\)
and launch a Command Prompt as Administrator.
Move or copy the patched rom file inside the NVFlash folder
With the Command Prompt go in the NVFlash folder and use the command "nvflash --list"
to show a list of your GPUs in your system

Look at the <0> or <1> near the "Graphics Device" text.
In this example is corresponding to <0>=First GPU <1>=Second GPU
We need to remove the write protection from the GPU with the command "nvflash -i0 --protectoff"
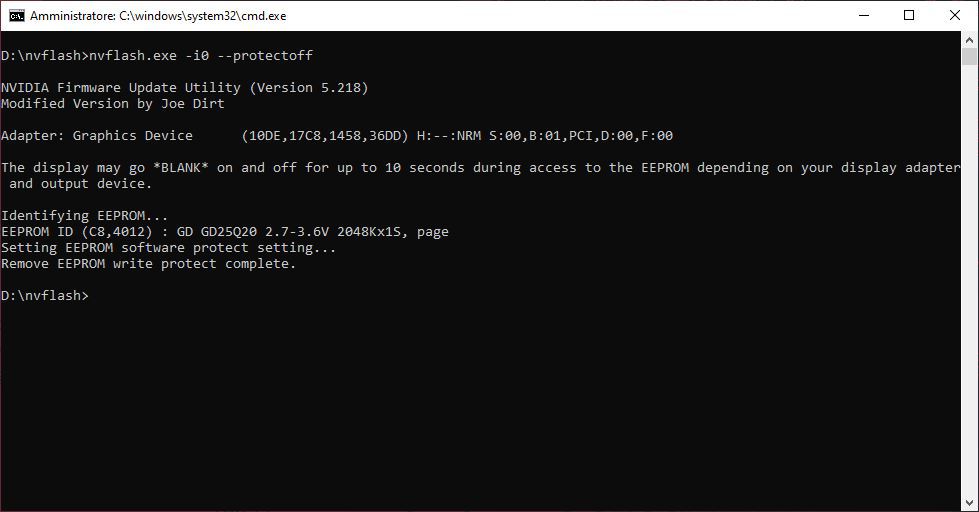
The "-i0" meaning to use the first GPU, so to do the same to the second GPU in the example we have to change as "-i1". This is why before I have explained about "the 0 and the 1"
Now is possible to flash the patched rom with the command "nvflash -i0 name_or_your_rom_file"
and confirm by pressing only the Y key when requested
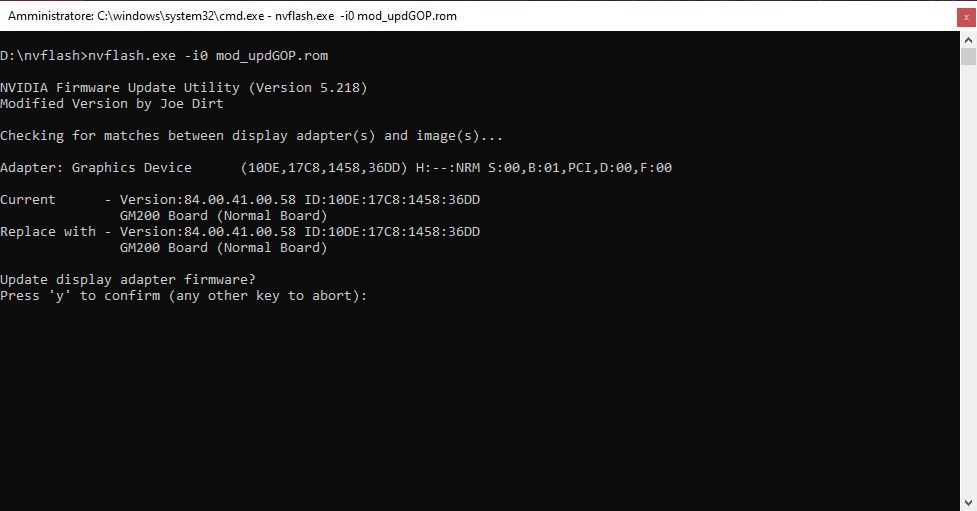
This screenshot show the confirmation of a good flashing

Remains only to restore the write protection with the command "nvflash -i0 --protecton"
and next you can reboot your system!

2. Create a Custom Resolution
The ViewSonic XG270 with the new firmware + PureXP™ enabled work best with 120Hz (Welcome "CRT IPS" style!)
so, simply choose this frequency in NVIDIA Control Panel or similarly in AMD Radeon Settings.
Now play your games with V-SYNC enabled (better if forced through NVIDIA or AMD Panel and disabled ingame)
or use the Low-Lag V-Sync trick, very well explained here and achievable thanks to a software
called Rivatuner Statistics Server enhanced by Guru3D.com and all the people around it!
In any case remember to have a frame rate equal to monitor herz (120fps=120Hz) with strobe enabled.
If you want to understand why, give a look here: As mentioned above by the Chief you can stop here and jump to Section #3, however if you're capable to handle all the power of that monitor, thanks to a modded GPU in the Section #1 or with a new/compatible GPU, we can make a special refresh rate
used in combination with Rivatuner Statistics Server: a large total vertical lines
to speed up the frame delivery from the GPU to XG270 (Quick Frame Transport Hack).
Note: new custom resolution info near the end of Section #2
Let me explain step by step: a proper way to manage and mantain clean all the info inside the monitor "driver" is possible via the Custom Resolution Utility made by ToastyX: Custom Resolution Utility (CRU)
After the extraction of the compressed software in a folder, launch CRU.exe

As you can see there's a lot of resolution and frequency combinations.
My suggestion is to clean and maintain only what you really need to easly select inside your games or applications.
In the Standard resolutions section we can remove all the things inside by pressing the Delete all button
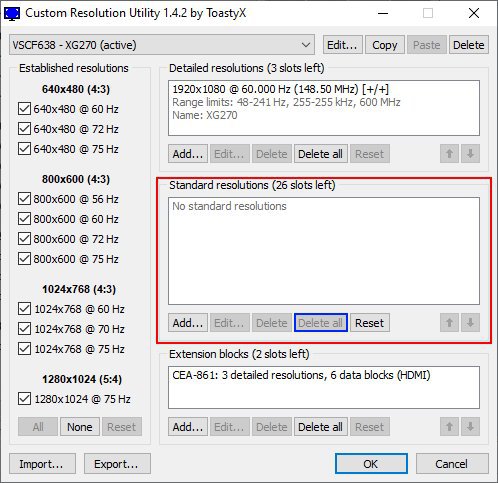
Same in the Established resolutions section by pressing the None button

Now let's focus on the Extension blocks section by selecting the preconfigured
CEA-861 block and press the Edit button
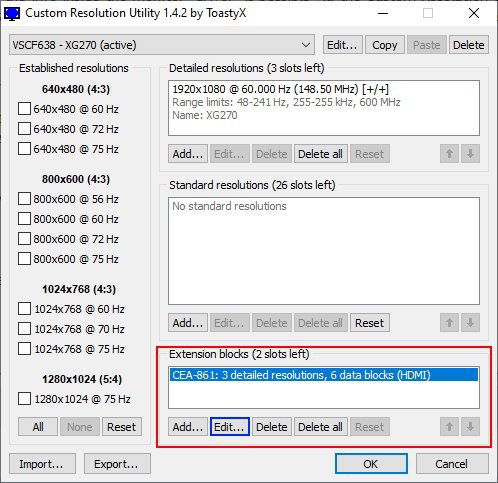
Here, in Data blocks, we can select TV resolutions and remove them with the Delete button
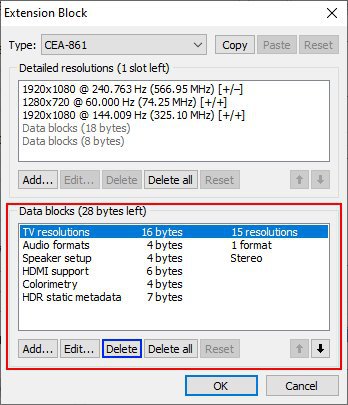
Optionally you can remove HDMI support, because technically we are using the DisplayPort.
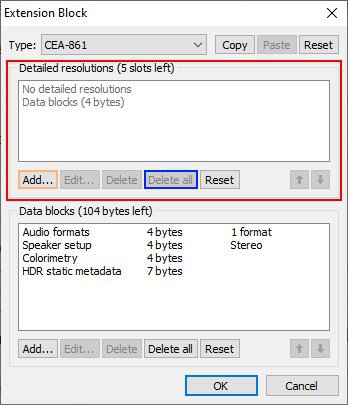
In Detailed resolutions section remove all with the Delete all button and next press the Add button
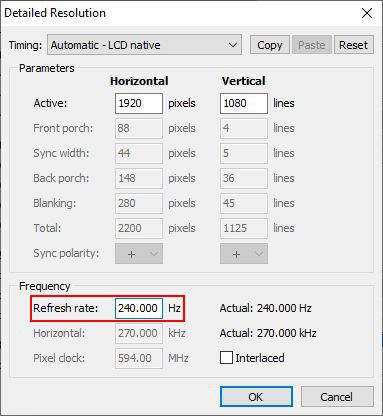
Look in the Timing section and choose "Automatic - LCD Native"

In Refresh Rate type 240 and confirm by pressing the OK button
Select the new resolution and press the Edit button

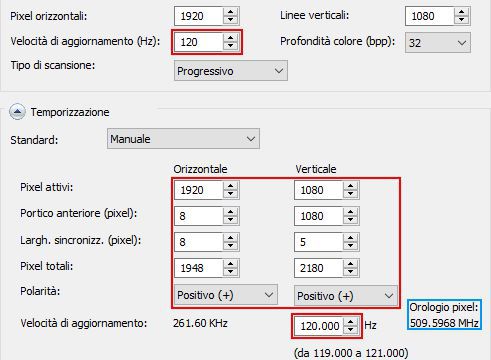
Click on Pixel Clock and Total then let's focus on the Total Vertical Lines:

To get a QFTx2 we have to do this calculation: (Total Vertical Lines x Refresh Rate) ÷ Target Refresh Rate
so, calculate (1125 x 240) ÷ 120 = 2250
Write the new Total Vertical Lines and looks at the changes in Refresh Rate
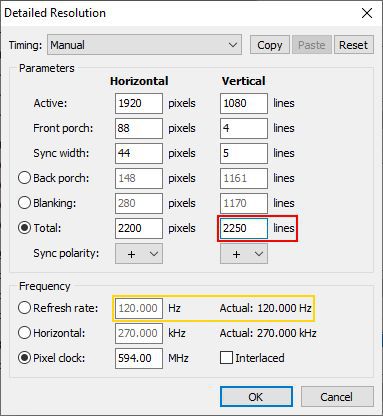
Enjoy the "overweight" 120Hz !
Continue to press all the OK buttons to close the utility and confirm all the changes.
To see the changes you have to reboot your computer or run the restart64.exe (64bit)
to restart on-the-fly the video driver.
Thanks to Chief Blur Buster we have received another great info about this monitor, capable to drastically reduce the input lag!
I have decided to leave the custom resolution on top for teaching and as reminder, but the preferred way
is to make the special 120Hz resolution with the exact parameters shared by the Chief
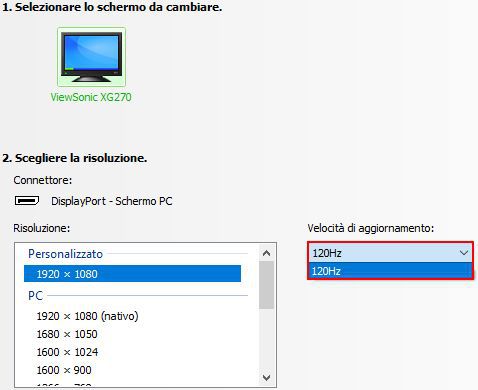
Use the NVIDIA Control Panel to create it (same if you're on the AMD Radeon Settings)
Lastly select Change Resolution from the left pane and choose the 120Hz refresh rate.
Now, how we can correctly use this low-inputlag profile?
Thanks to Rivatuner Statistics Server and his Scanline Sync (S-Sync)!
Simple explanation: the "standard" V-Sync handled in Windows don't have any low lag benefits when it's in use the "fat" refresh rate. So, thanks to S-Sync we can utilize our QFT with all good advantages.
To configure and understand how the Scanline Sync works I suggest these very good readings:
- RTSS Scanline Sync HOWTO
- Combine RTSS Scan Line Sync with VSYNC ON / Fast Sync / Enhanced Sync
- Guide how to use RTSS's Scanline Sync
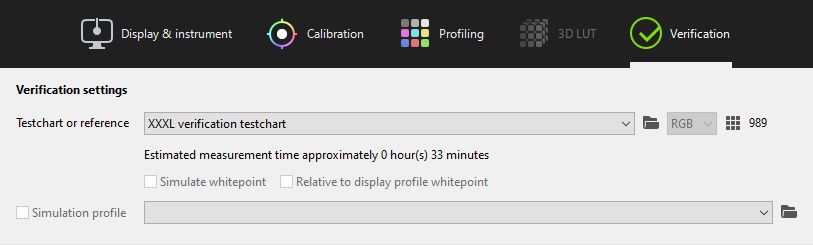
3. Display calibration and profiling
I've profiled this monitor with my X-Rite i1 Display Pro and the DisplayCAL software,
when PureXP™ is enabled achiving an sRGB color space equal to 99.7%
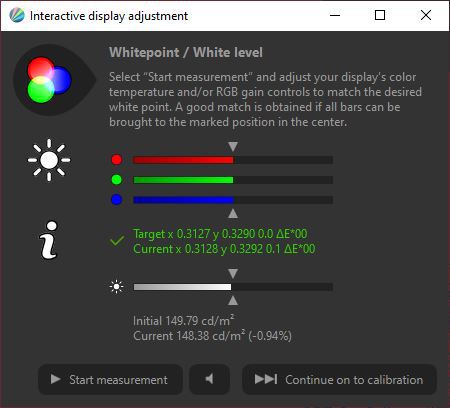
Let's first tune On-Screen Display Menu pressing the joy key in the bottom of our monitor
(this is an example to undestand what is the On-Screen Display Menu)
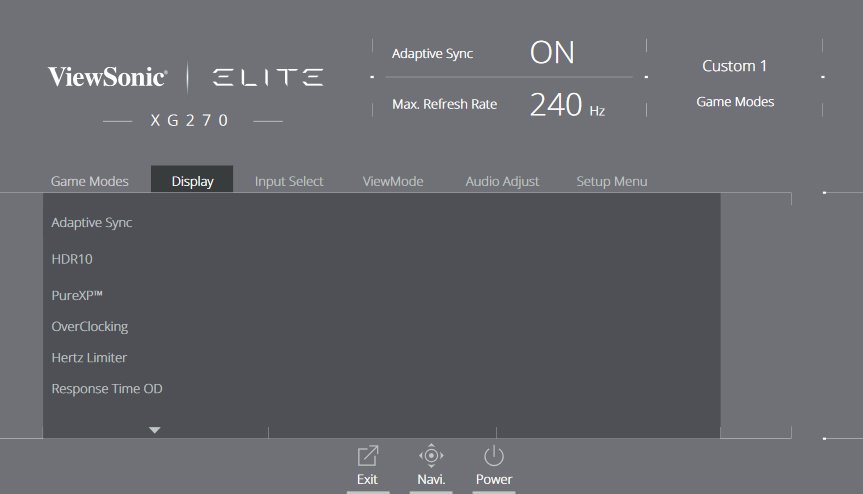
These are the changes I've made:
- Display > PureXP™ > Extreme
- Display > Blue Light Filter > 0
- Display > Color Temperature > Full Color Control > Red > 100
- Display > Color Temperature > Full Color Control > Green > 99
- Display > Color Temperature > Full Color Control > Blue > 99
- Display > Color Adjust > Color Space > RGB
- Display > Color Adjust > Color Range > Full Range
- Display > Color Adjust > Gamma > 2.2
- Display > Color Adjust > Color Saturation > 53 (I have noticed better color gradation with that value)
- Display > Image Adjust > Sharpness > 0
Before you can download and install my color profile I want to show the options used in DisplayCAL:


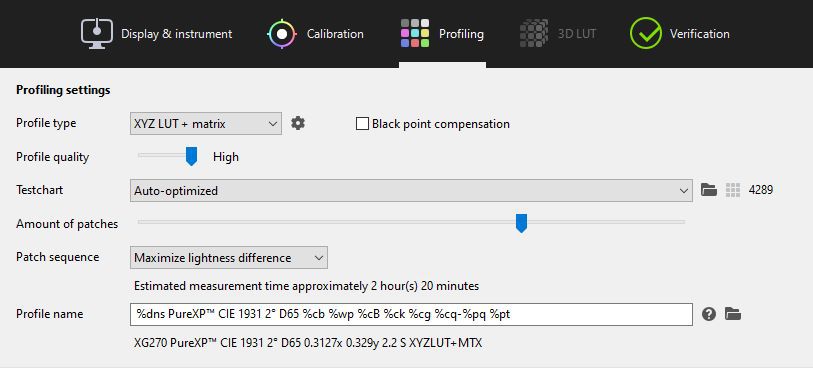

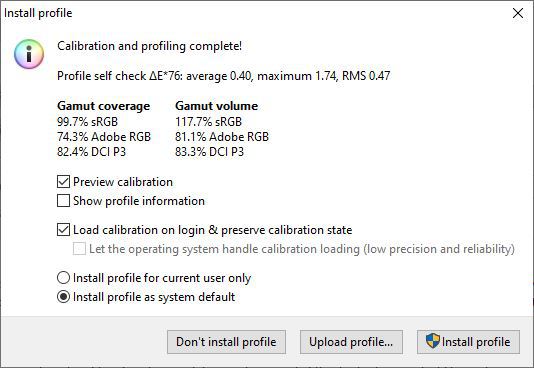
XG270 PureXP™ Extreme CIE 1931 2° D65 0.3127x 0.329y 2.2 S XYZLUT+MTX
- XG270 PureXP™ Extreme ICC Profile ONLY
SHA256: 79068DDFF540BA7F35294DFFD42CCF1C18AFA17F421B346237C3BB62833C4271 - XG270 PureXP™ Extreme FULL Package
SHA256: D381F5598809162640C42EBA6A8929514F7F158224D75851D5264F8CBEE5CB71
"FULL Package" have all the things made by DisplayCAL (useful if you want to create a 3DLUT profile, for example)
On all Windows Operating Systems the profiles are located "C:\Windows\System32\spool\drivers\color"
so, you have to extract there the profile, open the Windows Display settings and choose the custom .icm
By the way I suggest to download DisplayCAL, because is followed with an utility called DisplayCAL Profile Loader capable to manage better color profiles and auto fix the system or the applications when are not using them.
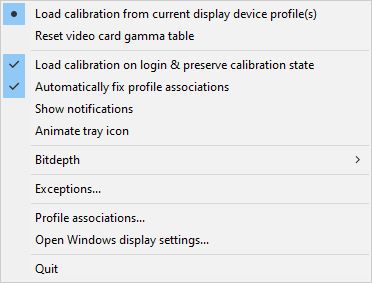
Right click on the gray curved arrow locate in the Notification Area and select "Profile associations..."

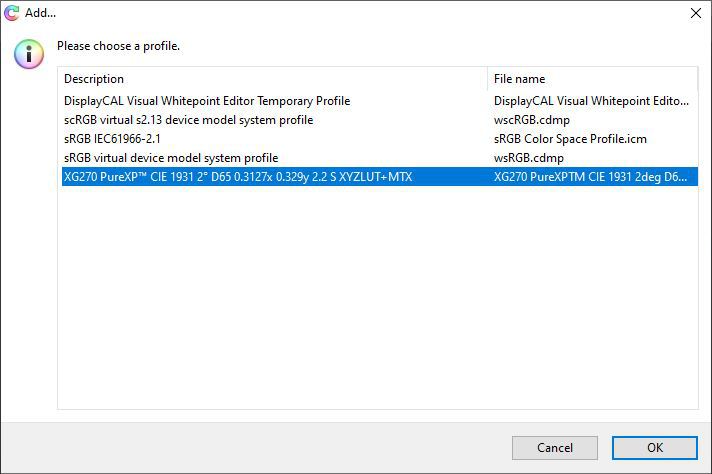
Select "Use my settings for this display device" and next to the Add button
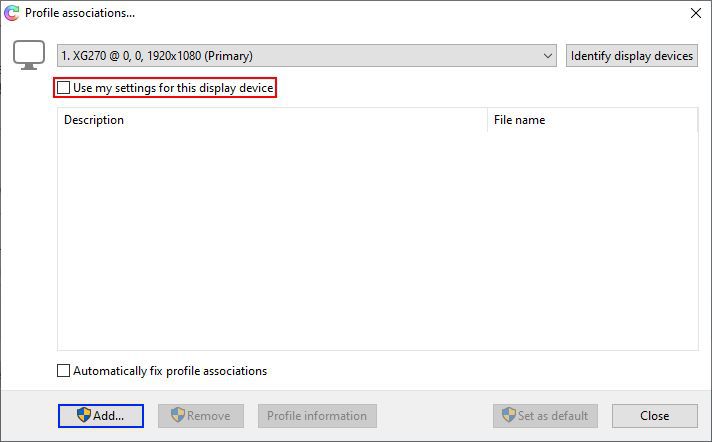
Choose the profile and confirm with the OK button
Now select "Automatically fix profile associations", follow the steps explained and confirm

Again right click on the gray curved arrow and press "Load calibration on login & preserve calibration state"
Enjoy the Blur Busters approved monitor in all his glory!
I remain open to constructive criticism, suggestions and improvements
Thanks for reading and I hope you liked!
[EDIT] changes and typo corrections.

